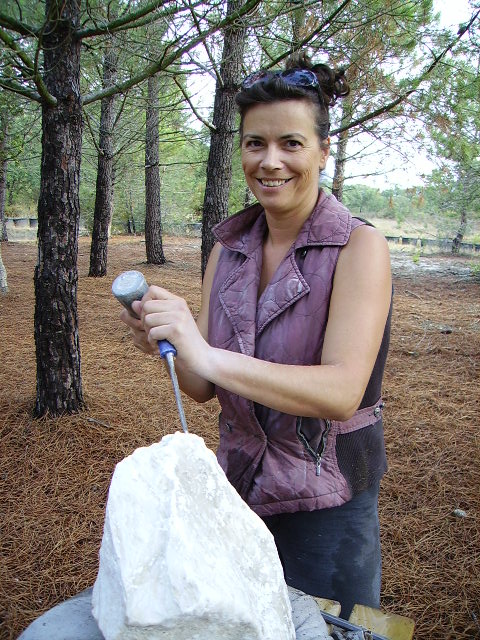
Workshop stones, create a sculpture
Tools:
Marble Rasps and files Wood Files coarse and fine Hammer Chisels, flat and pointchisel Sandpaper (waterproof), 600, 400 etc. Paintbrush for the dust, Sandbag
Buck Stone:
Serpentine fairly hard Alabaster medium to hard Soapstone soft (vulnerable) Start working with a stone, without example, the stone as inspiration:
• Choose a stone that appeals to you,
• Look at the overall shape of the stone, in all positions,
• Look at the lines and thickening of the stone,
• Maybe you see the shape you want to have in blurred vision,
The first file action:
Choose a line which is very decisive. You must make this line deeper or longer. Then you look again at the stone.
Now you can search, watch and fantasize about the form. If you work abstract maybe you see the form not yet. That is not bad. Just go on with the lines.
The lines of the overall shape, as the lines on the image, caused by the deep grooves of the cores is in the stone.
General:
Working with stone is a tough job. It is a natural product, rather hard and every stone is different. It takes time, effort and patience. The end result is essentially. The stone is alive by the shape and the colors and especially the veins contribute as well.
• Be inspired. The world around you, the landscape, nature, people, faces, etc offers a variety of forms.
• At the start: Always take the worst side to begin with. Worse here means, where fractures or cracks are running. If you tap it sounds dull, it means that the fracture is going through.
• Take care with the most beautiful side, be careful with irregular angles, shapes or contours, because they make the shape and form special and you could use them later on.
• Think big and rough lines:
In the beginning, the broad outlines are the most important lines, these determine the direction the stone wants to go / can. Let this lead you, use them.
• Think big and rough lines: This should. When sculpting stone, you take material away. While filing or chop the shape will appeare. If you start too small on the stone, the shape will get smaller and smaller and the visual image has no function. It will not have an effect.
• Take regular distance to the total picture.
• Keep the relationships in the form in constant watch. • Have patience. Your image grows through your actions, but that takes time. There is a relationship between you and your image. Ultimately, the form will show you what to do, and where you most shop or file.
• Do not be afraid to remove material, there must go off a lot often before the shape appeares. •
An image is three dimensional. We do not work on the plane level. Deep grooves, concave or convex shapes, cuts ultimately ensure that your image is three dimensional, because it becomes a game of light and darkness.
• Squeeze your eyes, shut a little bit and look through your eyelashes at the total picture, you see where lines should be heavier, or a place that must be smaller or rounder etc.
• Continue to turn your image. It is finally a three-dimensional image. And thus from several sides to admire. Please note that when you take away somewhere that may have impact on the visual shape or at the other side.
• The negative space (the space where no stone is) and the positive space (the stone) together they ensure you that your image is fascinating to watch and preferably from all sides. The hole: The make a hole in a stone is physical no so difficult, but for the image, the shape, it is a determining factor.
This hole:
• attracts the attention of the viewer towards him;
• participates in the play of light and darkness;
• the connection between front and rear;
• plays an important role for the overall visual image
• have a function in the visual image, such as eye
Photo and or object as inspiration:
• Choosing a stone, where the chosen form somehow is recognizable;
• Watch the multiple angles of the stone, so that from the start, you thought about the three-dimensionality of the image;
• Maybe you want to make sketches of the shape of multiple pages viewed;
• Draw on the stone with crayons or charcoal the main lines. These helps you at the start of the cut, in order to make the shape. Repeated application of these lines.
• Only the main line and above the whole form, the details are in the early stage of no importance because at first we must remove material before the form shape comes out. Only when the form is properly inserted, you make the details.
Abstract or figurative:
When creating an abstract form, it is easy, because there is absolutely no obligation in any form you will make, the direction you go is up to you, and you can fill it out completely, so basically everything is okay. In this way you have the possibility to learn about the stone and the tools and to develop a special sense for three-dimensionality. That is difficult enough. Your eyes see and know how things look and form, but to create this actually with your hands, is a different story. A question of carving very often.
At the same time is an abstract form also really difficult because you have no grip, you do not know which direction you should go.
In the beginning, so you work on your intuition, you see the big picture and the overall shape and you keep looking and trying to visualize how a line or shape will go on through the other side, top or bottom, left or right.
For abstract forms we use geometric elements: straight or round, curved lines, angles, hollow balls or shapes, or lines should preferably flow into each other or in contrast with each other.
An abstract shape is exciting, if you keep looking, you walk around it, there is no top and bottom, front and back.
The final phase, the artwork is almost finished, is the most difficult phase.
When the image is ready? This is also for me, always difficult.
In figurative is often much easier to determine, because you know what to imagine. And you have your own standard, how recognizable I make this. In abstract, this is unclear and that is a feeling and is dictated by experience, but also of personal preference.
Actually, you can say an abstract image is never finished.
Today you have the feeling, it’s good, it’s done. The next hour, day, week, year, do you think very differently.
It is also very important at this stage that you let other people watch and be open to everything they say, because at some point you are blind to your own image, which can help you to look different to your own product and maybe do some corrections.
Figurative or realistic is somehow a recognizable form, it seems easier because a human form, animal or plant, are recognizable things. Even though when it is not one hundred percent according to nature, everyone will understand what it must be.
And because you know what form you are making, you’ll see pretty quickly where some material has to be taken away.
The advantage is that recognizable objects are available, you can use as inspiration or even as a touchable object, so you could copy ratio and sizes.
I always try whether abstract or figurative, to put my own interpretation in my piece of art, to make a copy, I find it boring, then I can go to the store and buy it and I don´t have all the trouble to make something by myself.
When the workpiece is ready? When you as a creator of the workpiece are satisfied with the result, you have a good feeling.
Your skills and knowledge of materials and tools will improve over time and it will be reflected in the images you make. It is fun and instructive to see the development in the images. So to throw it away is a sin.
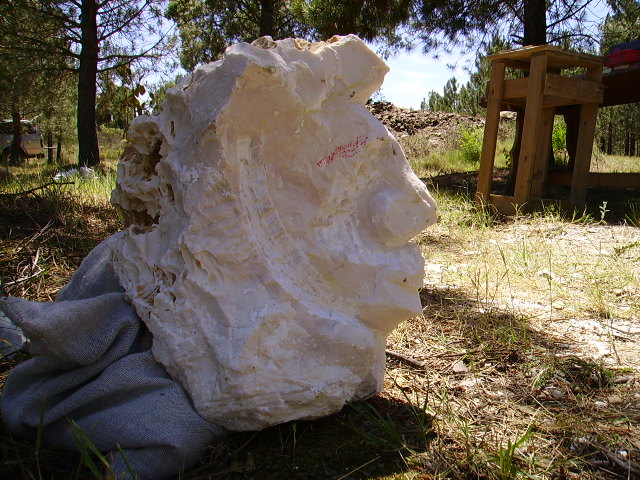
The head:
To sculpt a head is a complicated task and is more suitable for the more experienced sculptor. A human head has a characteristic shape and the sculptor most take notice in advance by choosing the stone. There has to be enough stone for example, to shape a nose. The visual elements of a human head are: Symmetry, nose, lips, jaw, cheeks and eyes should be somehow visible, to achieve a good result. But what is good?
The challenge is even greater when it is here or there in terms of rock mass is not right.
The symmetry is often the most difficult picture element, because the stone is very often not symmetrical. If you choose a cut block, I advice you to put the stone with a sharp angle forward, so your vision is right on two sides, this also applies to the rough stone. A rib or sharp angle of the stone, could be a good line, as a nosebridge.
Another point which is almost never considered, is the neck. Often you see heads without a neck and standing on a pin. This can be a solution, but at the same time is also the difficulty, because all the weight is resting on the pin and thereby is the balance of great importance.
If you choose a head with neck, you don´t have the above problem and the advantage is that the head gets more realistic.
The disadvantage is that you have more picture elements which you most be aware about in the start, choosing a stone. You want that finally all the picture elements together are in harmony. Again the advice, but that applies to all images that you want to make, do not go straight into detail work, keep the big picture first follow the application form, keep track on the whole and only when the crude form is properly inserted , go to apply and refine the details.
As an additional tool allows you to draw a cross over the head, it divides the head into 4 main fields directly. The vertical axis runs across the nose bridge, crosses the horizontal axis on the tip of the nose. The center of the upper part you draw again a horizontal line that marks the position of the eyes. For the lower part the same story, and this line marks the interface between the lips. This schematic organization is a very good tool because you are able to work as symmetrically as possible, and as we know this is very important for a head.
Take regular distance, so you force yourself to keep looking at the whole form and you can intervene or change where necessary.
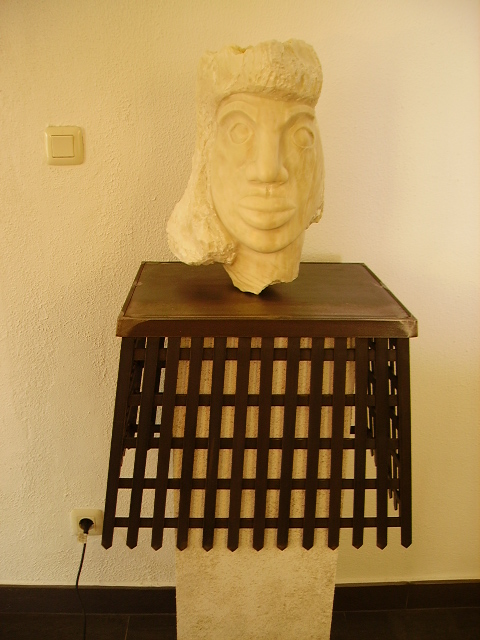
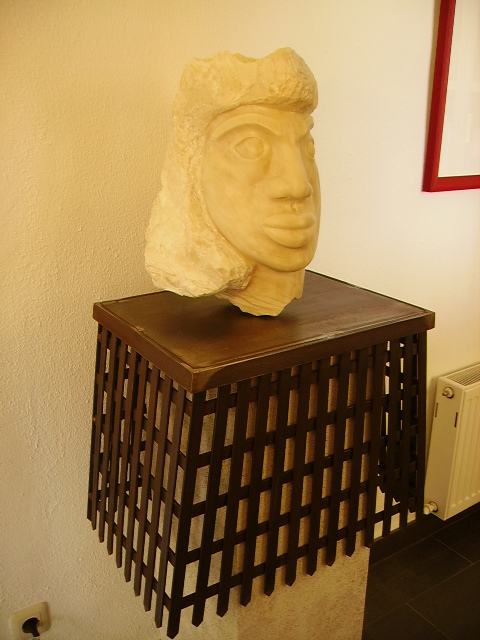
Presentation:
At the presentation you think quickly, a nice collum below it and you’re done.
Yet it is still important to think good, how and where you are going to place the sculpture. Many ways and substrates may be good, but the picture should have the best fitt.
A rough stone or a large flat metal base, or just a little, or a high collum.
The possibilities are endless. Allow people to look with you, to make a good choise together is easier. Tastes are different, and several solutions are possible.
Technique:
• Always file in one direction. The teeth on the file are going to be bone.
• Hold the file up with both hands, so you can steer with one hand and push with your other hand.
• The small marble files also as above, but use only at the finish to scratches and grooves and to make the details.
• with the tip and the flat chisel hit and chop always at the edge of the stone, When you hit in the middle, the force could go through the stone, it´s vibrates and can cause the stone to break. The cutter you put in an angle of about 40 degrees. The beveled edge of the chisel against the stone, so it is laing against the stone.
• Sandpaper from coarse to increasingly finer (waterproof) to get the sculpture smoother and smoother..
• Depending on the stone 2 or 3 times in the wax, beeswax or colorless antiekwas. There are several products which can be used for the treatment. Depending on where you put the sculpture, inside or outside, in Spain or the Netherlands. For those countrys which have a very cold climat, consult books or seek the advice of the natural stone trade, because you must protect the stone for frost. In Spain I spray the images with a clear coat, so the sculpture can stand in the sun without the wax is “running off”.